Setting Up Automations
Configure automated notifications and messages for your business workflow.
Overview
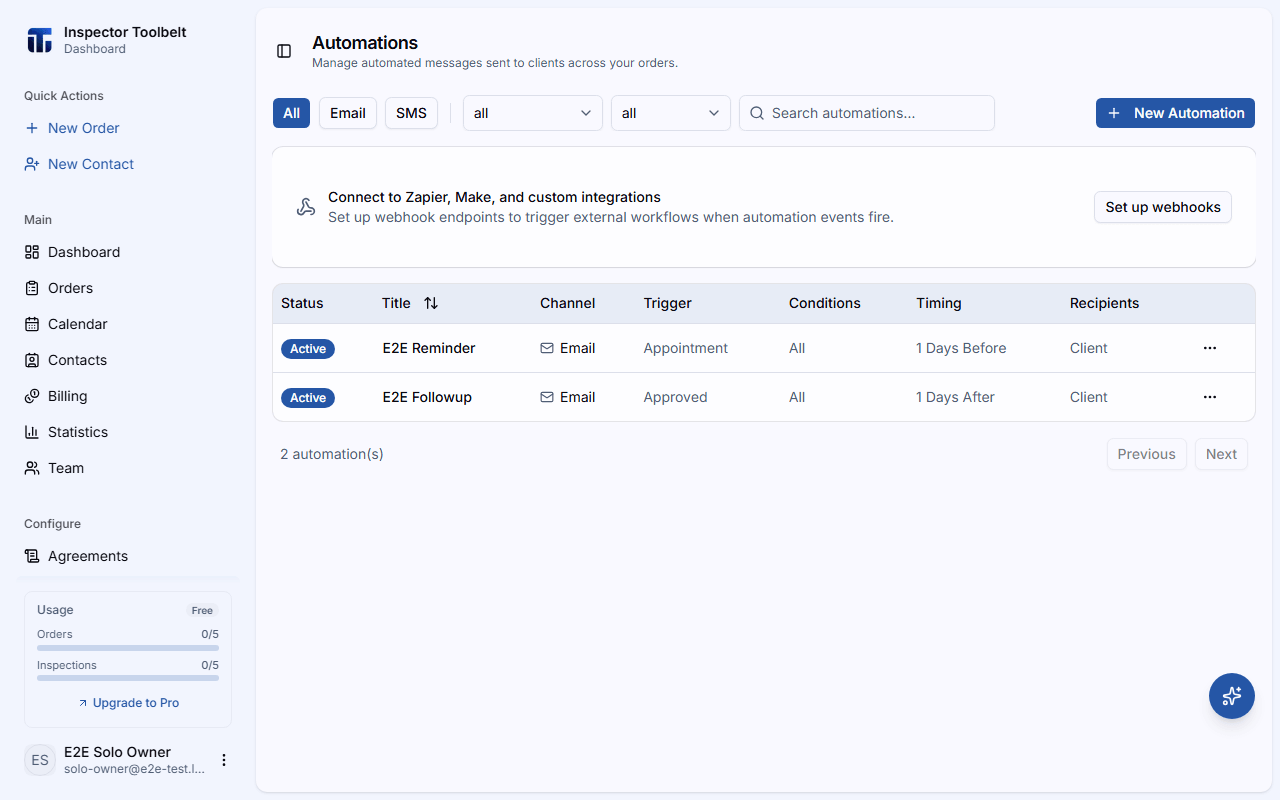
Automations let you send email and SMS messages automatically based on Order lifecycle events. For example, you can send a reminder to the client 24 hours before their appointment.
Creating an Automation
Navigate to Automations
Click Automations in the sidebar and then click New Automation.
Configure the Trigger
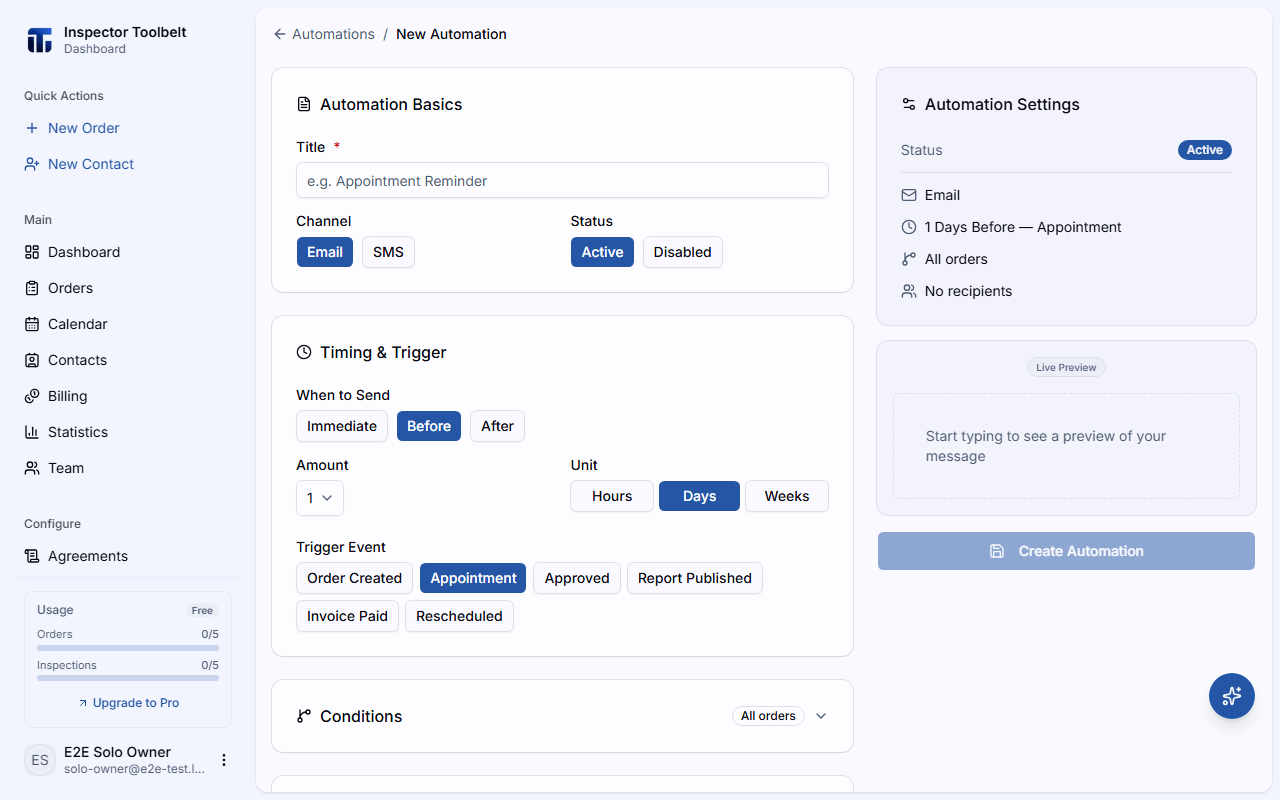
Set up when and how the automation fires:
| Setting | Description |
|---|---|
| Name | A descriptive name for this automation |
| Channel | Email or SMS |
| Trigger | The event that activates this automation (see trigger types below) |
| Timing | When to send: Immediate, or a set time Before/After the trigger using Hour, Day, or Week units |
| Recipients | Who receives the message (client, custom email addresses) |
Available Triggers
| Trigger | Description |
|---|---|
| Request Date/Time | When the Order was originally created |
| Appointment Date/Time | The scheduled appointment date |
| Approved Date/Time | When the Order was approved |
| Rescheduled | When an appointment is rescheduled |
| Invoice Paid | When a client pays an invoice |
| Report Published | When a report is published |
| Completed Date/Time | When the Order status is set to Complete |
Timing restrictions
Some triggers only support After or Immediate timing — for example, you cannot send a notification before an invoice is paid or a report is published.
Agent notifications
You can also send notifications to the buyer's agent and listing agent attached to an Order.
Write the Message Template
Write your message content using the rich text editor. Use merge tags to insert dynamic data. Merge tags use the format *|TAG_NAME|*:
| Tag | Value |
|---|---|
| `* | CLIENT_NAME |
| `* | INSPECTION_ADDRESS |
| `* | DATE |
| `* | CURRENT_DATE |
| `* | INSPECTION_FEE |
| `* | AGREEMENT_LINK |
| `* | PAYMENT_LINK |
| `* | INVOICE_PDF_LINK |
Additional agent tags:
| Tag | Value |
|---|---|
| `* | BUYER_AGENT_NAME |
| `* | LISTING_AGENT_NAME |
Report-specific tags (available with the Report Published trigger):
| Tag | Value |
|---|---|
| `* | REPORT_LINK_PDF |
| `* | WEB_REPORT_LINK |
Save and Activate
Review your automation settings and click Save. The automation is active immediately.
Managing Automations
From the automations list, you can:
- Toggle active/inactive — pause an automation without deleting it
- Edit — modify the trigger, timing, or message content
- Duplicate — create a copy to use as a starting point
- Delete — permanently remove the automation